
Installing vim-console on Windows 2022 from PowerShell
Working with Windows Containers has provided me tremendous education. Learning PowerShell has shown me how far the windows realm has come in the form of CLI management. It still seems to be lacking in a few areas, and I really don’t like the extremely verbose syntax nor the single dash arguments. But I digress. This post is about solving a single problem. The one problem with endless obtuse workarounds.
Problem
Editing text files…from a windows CLI (cmd.exe, PowerShell, etc).
Solution
Find the Microsoft equivalent of Vim. Is that Notepad.exe? Wordpad.exe? Get-Contents? Fail, Fail, Mostly-Fail
My Solution
Install vim-console; an extremely powerful text editor that has proven to be the staple of all *nix users around the world for decades.
Note: There are many articles similar to How to Edit Files with a Real PowerShell Text Editor that show how to use Chocolaty to install Vim, Emacs or Nano. However, most of my use cases don’t allow Chocolaty in their datacenters. So, we have to install vim the hard way.
Steps
-
SSH to your server.
Don’t know how to setup ssh on Windows? I will point you at their documentation: Getting Started OpenSSH for Windows
-
Verify you are in PowerShell.
Type the command
powershellorpwshand hit enter.
Look for the
PSin front of your command prompt.
-
Download vim-console artifacts from NLUUG - dunno where I found this
wget https://ftp.nluug.nl/pub/vim/pc/vim90rt.zip -o vim90rt.zip wget https://ftp.nluug.nl/pub/vim/pc/vim90w32.zip -o vim90w32.zip -
Extract archives
expand-archive .\vim90w32.zip -DestinationPath . expand-archive -Force .\vim90rt.zip -DestinationPath . -
Run installer
cd vim\vim90
.\install.exe
Change settings as needed and say
dfor do it.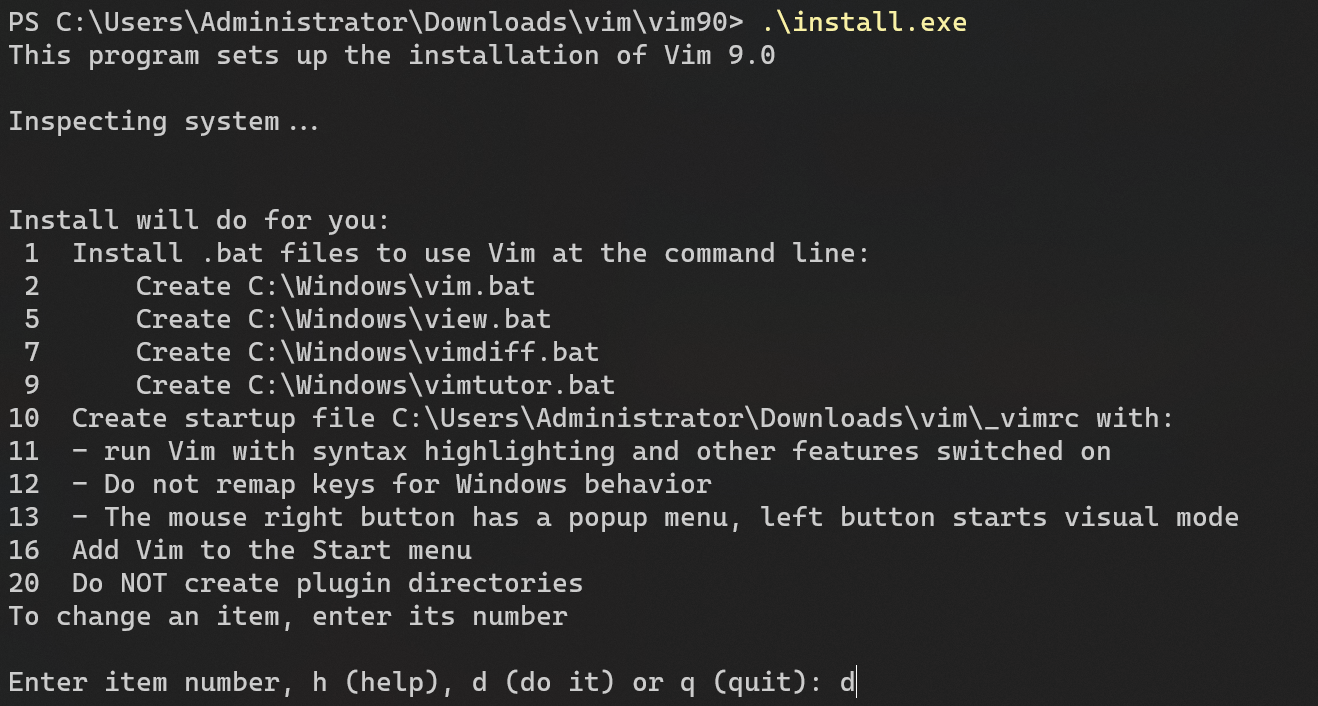
-
Run and Profit
- Simply type
vimand hit enter - To exit, the key sequence
Esc-:-q-<enter>will exit.
- Simply type
Conclusion
I didn’t go into a lot of detail but hopefully this helps with the steps for using VIM.
-Nate