<?xml version="1.0" encoding="utf-8"?><feed xmlns="http://www.w3.org/2005/Atom" ><generator uri="https://jekyllrb.com/" version="3.10.0">Jekyll</generator><link href="https://nr3v0.github.io/feed.xml" rel="self" type="application/atom+xml" /><link href="https://nr3v0.github.io/" rel="alternate" type="text/html" /><updated>2026-10-12T03:11:52-07:00</updated><id>https://nr3v0.github.io/feed.xml</id><title type="html">Revo Place</title><subtitle>Technology adventures with OpenShift, Kubernetes, Linux, Windows containers and the home lab. Formerly revo.place and therevoman.blogspot.com.</subtitle><author><name>Nate Revo</name></author><entry><title type="html">Sharing One Switch Mirror Port with Multiple VMs on OpenShift Virtualization</title><link href="https://nr3v0.github.io/2026/10/sharing-a-switch-mirror-port-with-multiple-openshift-vms.html" rel="alternate" type="text/html" title="Sharing One Switch Mirror Port with Multiple VMs on OpenShift Virtualization" /><published>2026-10-06T17:46:00-07:00</published><updated>2026-10-06T17:46:00-07:00</updated><id>https://nr3v0.github.io/2026/10/sharing-a-switch-mirror-port-with-multiple-openshift-vms</id><content type="html" xml:base="https://nr3v0.github.io/2026/10/sharing-a-switch-mirror-port-with-multiple-openshift-vms.html"><![CDATA[<p><em>How to feed a single SPAN/mirror port into more than one OpenShift Virtualization VM, why the obvious options don’t work, and the bridge setting that fixes it.</em></p>

<hr />

<h2 id="the-problem">The problem</h2>

<p>You’ve set up a mirror (SPAN) session on your switch and patched the destination port into a spare NIC on an OpenShift node. You want <strong>two VMs</strong> to see that traffic: say, an IDS like Suricata and a packet capture or Zeek box. One or both may also need to send traffic back out through that port.</p>

<p>This sounds simple, but most of the obvious ways to give a VM a physical network don’t work for mirrored traffic. Mirrored frames aren’t addressed to your VMs. They’re copies of conversations between <em>other</em> hosts, so their destination MACs belong to machines that may not even be on this network segment. Anything that forwards based on destination MAC will quietly drop most of them.</p>

<p>This post walks through the options, explains why most of them fail, and shows a working setup that uses a Linux bridge running as a hub.</p>

<p>My lab host, <code class="language-plaintext highlighter-rouge">snok</code>, is a single-node OpenShift 4.22 cluster with OpenShift Virtualization on an ASRock Rack EPYCD8 board. It has two spare onboard NICs (<code class="language-plaintext highlighter-rouge">enp65s0f0</code>, <code class="language-plaintext highlighter-rouge">enp65s0f1</code>) next to the 25G bond that carries cluster traffic. The examples use those names, so substitute your own.</p>

<hr />

<h2 id="the-options">The options</h2>

<table>
  <thead>
    <tr>
      <th>Approach</th>
      <th>Both VMs see all traffic?</th>
      <th>Why / why not</th>
    </tr>
  </thead>
  <tbody>
    <tr>
      <td><strong>OVN-Kubernetes localnet</strong> (ClusterUserDefinedNetwork)</td>
      <td>❌</td>
      <td>OVN is a logical switch. It delivers frames to the port that owns the destination MAC. Mirrored frames are addressed to other hosts, so they mostly go nowhere.</td>
    </tr>
    <tr>
      <td><strong>PCI passthrough</strong> of the NIC port</td>
      <td>❌ (only one VM)</td>
      <td>Works well for <em>one</em> VM, but a device can only be passed to one guest.</td>
    </tr>
    <tr>
      <td><strong>SR-IOV VFs</strong></td>
      <td>❌</td>
      <td>Each VF filters on its own MAC. Promiscuous VFs need hardware and driver support (and “trust” mode), and even then results vary, especially on 1G Intel parts.</td>
    </tr>
    <tr>
      <td><strong>macvtap</strong></td>
      <td>❌</td>
      <td>Bridge mode only delivers frames for the macvtap’s own MAC. Passthrough mode is one guest only.</td>
    </tr>
    <tr>
      <td><strong>Linux bridge, normal mode</strong></td>
      <td>⚠️ Partly</td>
      <td>Unknown-destination frames are flooded, but the bridge learns MACs and can then forward frames <em>away</em> from the VMs. Behavior changes over time.</td>
    </tr>
    <tr>
      <td><strong>Linux bridge, hub mode</strong> (<code class="language-plaintext highlighter-rouge">ageing-time 0</code>)</td>
      <td>✅</td>
      <td>No MAC learning, so every frame is flooded to every port. Both VMs see everything.</td>
    </tr>
  </tbody>
</table>

<p>The winner is the last row. A Linux bridge with MAC learning turned off behaves like an old-fashioned Ethernet hub: every frame coming in the mirror port goes out to every attached VM.</p>

<hr />

<h2 id="architecture">Architecture</h2>

<div class="language-plaintext highlighter-rouge"><div class="highlight"><pre class="highlight"><code>  Switch                         OpenShift node (snok-fast)
 ┌────────────┐                ┌──────────────────────────────────────────┐
 │ SPAN dest  │── patch cable ─┤ enp65s0f0 (promisc, GRO/LRO off, no IP)  │
 │   port     │                │      │                                   │
 └────────────┘                │  ┌───┴──────────────────────────┐        │
                               │  │ br-mirror (linux-bridge)      │        │
                               │  │  mac-ageing-time: 0  → hub    │        │
                               │  │  stp off, mcast snooping off  │        │
                               │  └───┬───────────────────┬───────┘        │
                               │      │ tap               │ tap            │
                               │  ┌───┴────┐         ┌────┴───┐            │
                               │  │ VM  A  │         │ VM  B  │            │
                               │  │ eth1   │         │ eth1   │            │
                               │  │ promisc│         │ promisc│            │
                               │  └────────┘         └────────┘            │
                               └──────────────────────────────────────────┘
</code></pre></div></div>

<p>Three pieces make this work:</p>

<ol>
  <li>A <strong>NodeNetworkConfigurationPolicy</strong> (NNCP) that builds <code class="language-plaintext highlighter-rouge">br-mirror</code> on the node with the spare NIC as its only uplink.</li>
  <li>A <strong>NetworkAttachmentDefinition</strong> (NAD) that exposes that bridge to VMs using the <code class="language-plaintext highlighter-rouge">bridge</code> CNI plugin.</li>
  <li>A <strong>second interface</strong> on each VM attached to that NAD.</li>
</ol>

<hr />

<h2 id="step-1-build-the-hub-mode-bridge-on-the-node">Step 1: Build the hub-mode bridge on the node</h2>

<p>The Kubernetes NMState Operator manages host networking declaratively. This policy takes over the spare NIC, turns off the offloads that would hide what’s really on the wire, and puts it in a bridge with MAC learning disabled.</p>

<div class="language-yaml highlighter-rouge"><div class="highlight"><pre class="highlight"><code><span class="na">apiVersion</span><span class="pi">:</span> <span class="s">nmstate.io/v1</span>
<span class="na">kind</span><span class="pi">:</span> <span class="s">NodeNetworkConfigurationPolicy</span>
<span class="na">metadata</span><span class="pi">:</span>
  <span class="na">name</span><span class="pi">:</span> <span class="s">br-mirror</span>
<span class="na">spec</span><span class="pi">:</span>
  <span class="na">nodeSelector</span><span class="pi">:</span>
    <span class="na">kubernetes.io/hostname</span><span class="pi">:</span> <span class="s">snok-fast</span>
  <span class="na">desiredState</span><span class="pi">:</span>
    <span class="na">interfaces</span><span class="pi">:</span>
    <span class="pi">-</span> <span class="na">name</span><span class="pi">:</span> <span class="s">enp65s0f0</span>
      <span class="na">type</span><span class="pi">:</span> <span class="s">ethernet</span>
      <span class="na">state</span><span class="pi">:</span> <span class="s">up</span>
      <span class="na">mtu</span><span class="pi">:</span> <span class="m">9000</span>
      <span class="na">ipv4</span><span class="pi">:</span> <span class="pi">{</span><span class="nv">enabled</span><span class="pi">:</span> <span class="nv">false</span><span class="pi">}</span>
      <span class="na">ipv6</span><span class="pi">:</span> <span class="pi">{</span><span class="nv">enabled</span><span class="pi">:</span> <span class="nv">false</span><span class="pi">}</span>
      <span class="na">ethtool</span><span class="pi">:</span>
        <span class="na">feature</span><span class="pi">:</span>
          <span class="na">rx-gro</span><span class="pi">:</span> <span class="no">false</span>        <span class="c1"># don't coalesce frames — deliver what was on the wire</span>
          <span class="na">rx-lro</span><span class="pi">:</span> <span class="no">false</span>
    <span class="pi">-</span> <span class="na">name</span><span class="pi">:</span> <span class="s">br-mirror</span>
      <span class="na">type</span><span class="pi">:</span> <span class="s">linux-bridge</span>
      <span class="na">state</span><span class="pi">:</span> <span class="s">up</span>
      <span class="na">mtu</span><span class="pi">:</span> <span class="m">9000</span>
      <span class="na">ipv4</span><span class="pi">:</span> <span class="pi">{</span><span class="nv">enabled</span><span class="pi">:</span> <span class="nv">false</span><span class="pi">}</span>
      <span class="na">ipv6</span><span class="pi">:</span> <span class="pi">{</span><span class="nv">enabled</span><span class="pi">:</span> <span class="nv">false</span><span class="pi">}</span>
      <span class="na">bridge</span><span class="pi">:</span>
        <span class="na">options</span><span class="pi">:</span>
          <span class="na">stp</span><span class="pi">:</span>
            <span class="na">enabled</span><span class="pi">:</span> <span class="no">false</span>
          <span class="na">mac-ageing-time</span><span class="pi">:</span> <span class="m">0</span>           <span class="c1"># never learn MACs → flood every frame (hub)</span>
          <span class="na">multicast-snooping</span><span class="pi">:</span> <span class="no">false</span>    <span class="c1"># flood multicast to every port too</span>
          <span class="na">group-forward-mask</span><span class="pi">:</span> <span class="m">16384</span>    <span class="c1"># also forward LLDP (01:80:c2:00:00:0e)</span>
        <span class="na">port</span><span class="pi">:</span>
        <span class="pi">-</span> <span class="na">name</span><span class="pi">:</span> <span class="s">enp65s0f0</span>
</code></pre></div></div>

<p>What each setting does:</p>

<ul>
  <li><strong><code class="language-plaintext highlighter-rouge">mac-ageing-time: 0</code></strong> is the key setting. Normally a bridge learns which MAC lives behind which port and forwards only there. With ageing at zero, learned entries expire immediately, so the bridge never has a forwarding entry and floods every unicast frame to all ports. That’s exactly how a hub behaves.</li>
  <li><strong><code class="language-plaintext highlighter-rouge">multicast-snooping: false</code></strong>: with snooping on, the bridge sends multicast only to ports that joined the group. Your sensors haven’t joined anything, so turn it off and let multicast flood too.</li>
  <li><strong><code class="language-plaintext highlighter-rouge">group-forward-mask: 16384</code></strong>: Linux bridges consume IEEE link-local frames (<code class="language-plaintext highlighter-rouge">01:80:c2:00:00:0X</code>) by default. Bit 14 (<code class="language-plaintext highlighter-rouge">0x4000</code>) lets LLDP through, which is handy for an IDS. The kernel won’t let you forward STP, PAUSE or LACP (bits 0–2) regardless.</li>
  <li><strong>GRO/LRO off</strong>: with these on, the NIC merges consecutive TCP segments into large super-frames before the bridge sees them. Capture tools then report packets that never existed on the wire, and IDS reassembly can get confused.</li>
  <li><strong>No IP on the NIC or bridge</strong>: the host doesn’t need to take part in this network. It just forwards frames.</li>
  <li><strong>MTU 9000</strong>: if any mirrored source port carries jumbo frames, the copies will be jumbo too. Undersized MTUs drop them silently.</li>
</ul>

<p>You don’t need to set promiscuous mode on the NIC. The kernel enables it automatically on any interface added to a bridge.</p>

<p>VLAN filtering is left <strong>off</strong> (the nmstate default when you don’t configure VLANs on the ports), so 802.1Q-tagged frames from a trunk mirror pass through with their tags intact.</p>

<p>Apply it and check:</p>

<div class="language-bash highlighter-rouge"><div class="highlight"><pre class="highlight"><code>oc apply <span class="nt">-f</span> nncp-br-mirror.yaml
oc get nncp br-mirror
oc get nnce
<span class="c"># On the node:</span>
<span class="nb">cat</span> /sys/class/net/br-mirror/bridge/ageing_time   <span class="c"># → 0</span>
ip <span class="nt">-d</span> <span class="nb">link </span>show enp65s0f0 | <span class="nb">grep</span> <span class="nt">-o</span> promiscuity.<span class="k">*</span>  <span class="c"># → promiscuity 1</span>
</code></pre></div></div>

<hr />

<h2 id="step-2-expose-the-bridge-to-vms">Step 2: Expose the bridge to VMs</h2>

<p>Create a NetworkAttachmentDefinition in the namespace where your VMs live:</p>

<div class="language-yaml highlighter-rouge"><div class="highlight"><pre class="highlight"><code><span class="na">apiVersion</span><span class="pi">:</span> <span class="s">k8s.cni.cncf.io/v1</span>
<span class="na">kind</span><span class="pi">:</span> <span class="s">NetworkAttachmentDefinition</span>
<span class="na">metadata</span><span class="pi">:</span>
  <span class="na">name</span><span class="pi">:</span> <span class="s">mirror-tap</span>
  <span class="na">namespace</span><span class="pi">:</span> <span class="s">default</span>
  <span class="na">annotations</span><span class="pi">:</span>
    <span class="na">k8s.v1.cni.cncf.io/resourceName</span><span class="pi">:</span> <span class="s">bridge.network.kubevirt.io/br-mirror</span>
<span class="na">spec</span><span class="pi">:</span>
  <span class="na">config</span><span class="pi">:</span> <span class="pi">|</span>
    <span class="s">{</span>
      <span class="s">"cniVersion": "0.3.1",</span>
      <span class="s">"name": "mirror-tap",</span>
      <span class="s">"type": "bridge",</span>
      <span class="s">"bridge": "br-mirror",</span>
      <span class="s">"mtu": 9000,</span>
      <span class="s">"macspoofchk": true,</span>
      <span class="s">"ipam": {}</span>
    <span class="s">}</span>
</code></pre></div></div>

<p>Notes:</p>

<ul>
  <li>The <strong><code class="language-plaintext highlighter-rouge">resourceName</code> annotation</strong> makes the scheduler place VMs only on nodes where <code class="language-plaintext highlighter-rouge">br-mirror</code> exists. On a single-node cluster that doesn’t matter much, but it costs nothing and protects you if you add nodes later.</li>
  <li><strong><code class="language-plaintext highlighter-rouge">ipam: {}</code></strong>: no addresses are handed out. Sensors listen and don’t need IPs on the capture interface.</li>
  <li><strong><code class="language-plaintext highlighter-rouge">macspoofchk: true</code></strong> only affects traffic <em>leaving</em> the VM. It stops the VM from sending frames with any MAC except its own. Leave it on for passive sensors. Set it to <code class="language-plaintext highlighter-rouge">false</code> only if a VM needs to inject traffic with other source MACs (for example, an inline tool or one that forges TCP resets).</li>
</ul>

<hr />

<h2 id="step-3-attach-the-vms">Step 3: Attach the VMs</h2>

<p>Add a second interface to each VM. Keep the VM’s normal management network as-is.</p>

<div class="language-yaml highlighter-rouge"><div class="highlight"><pre class="highlight"><code><span class="na">apiVersion</span><span class="pi">:</span> <span class="s">kubevirt.io/v1</span>
<span class="na">kind</span><span class="pi">:</span> <span class="s">VirtualMachine</span>
<span class="na">metadata</span><span class="pi">:</span>
  <span class="na">name</span><span class="pi">:</span> <span class="s">sensor-a</span>
  <span class="na">namespace</span><span class="pi">:</span> <span class="s">default</span>
<span class="na">spec</span><span class="pi">:</span>
  <span class="na">template</span><span class="pi">:</span>
    <span class="na">spec</span><span class="pi">:</span>
      <span class="na">domain</span><span class="pi">:</span>
        <span class="na">devices</span><span class="pi">:</span>
          <span class="na">interfaces</span><span class="pi">:</span>
          <span class="pi">-</span> <span class="na">name</span><span class="pi">:</span> <span class="s">default</span>
            <span class="na">masquerade</span><span class="pi">:</span> <span class="pi">{}</span>
          <span class="pi">-</span> <span class="na">name</span><span class="pi">:</span> <span class="s">mirror</span>
            <span class="na">bridge</span><span class="pi">:</span> <span class="pi">{}</span>
            <span class="na">model</span><span class="pi">:</span> <span class="s">virtio</span>
      <span class="na">networks</span><span class="pi">:</span>
      <span class="pi">-</span> <span class="na">name</span><span class="pi">:</span> <span class="s">default</span>
        <span class="na">pod</span><span class="pi">:</span> <span class="pi">{}</span>
      <span class="pi">-</span> <span class="na">name</span><span class="pi">:</span> <span class="s">mirror</span>
        <span class="na">multus</span><span class="pi">:</span>
          <span class="na">networkName</span><span class="pi">:</span> <span class="s">mirror-tap</span>
</code></pre></div></div>

<p>Repeat for <code class="language-plaintext highlighter-rouge">sensor-b</code>. Every VM attached to <code class="language-plaintext highlighter-rouge">mirror-tap</code> gets its own tap device on <code class="language-plaintext highlighter-rouge">br-mirror</code>, and the hub floods every frame to all of them.</p>

<hr />

<h2 id="step-4-configure-the-guests">Step 4: Configure the guests</h2>

<p>Inside each guest, bring the capture interface up with no address and in promiscuous mode:</p>

<div class="language-bash highlighter-rouge"><div class="highlight"><pre class="highlight"><code>ip <span class="nb">link set </span>eth1 up promisc on
ip <span class="nb">link set </span>eth1 mtu 9000
<span class="c"># Turn off offloads inside the guest as well, for accurate captures</span>
ethtool <span class="nt">-K</span> eth1 gro off lro off 2&gt;/dev/null <span class="o">||</span> <span class="nb">true</span>
</code></pre></div></div>

<p>Then point your tools at it:</p>

<div class="language-bash highlighter-rouge"><div class="highlight"><pre class="highlight"><code>tcpdump <span class="nt">-i</span> eth1 <span class="nt">-nn</span> <span class="nt">-c</span> 20
zeek <span class="nt">-i</span> eth1 <span class="nb">local
</span>suricata <span class="nt">-i</span> eth1
</code></pre></div></div>

<p>On a systemd-networkd or NetworkManager guest, make this persistent with a profile that has no IP configuration and promiscuous mode enabled, so it comes back after reboots.</p>

<hr />

<h2 id="gotchas-worth-knowing-before-you-start">Gotchas worth knowing before you start</h2>

<h3 id="1-can-the-vms-connect-through-the-mirror-port">1. Can the VMs “connect” through the mirror port?</h3>

<p>Often not. <strong>Many switches ignore incoming traffic on a SPAN destination port by default.</strong> It’s a one-way copy. If your VMs need to send traffic (active scanning, TCP resets, or simply having an IP on that segment), you have two choices:</p>

<ul>
  <li>Enable ingress on the mirror session. On Cisco IOS that’s <code class="language-plaintext highlighter-rouge">monitor session 1 destination interface Gi1/0/10 ingress vlan 20</code>, and other vendors have similar settings.</li>
  <li>Use a <strong>second, normal access port</strong> (on <code class="language-plaintext highlighter-rouge">snok</code> that’s the other spare NIC, <code class="language-plaintext highlighter-rouge">enp65s0f1</code>) for anything the VMs need to send, and keep the mirror port receive-only. This is usually the cleaner design.</li>
</ul>

<h3 id="2-the-vms-can-see-each-other">2. The VMs can see each other</h3>

<p>A hub is a hub. Anything sensor A transmits on its mirror interface goes to the physical port <strong>and</strong> to sensor B. For passive sensors that never send, it doesn’t matter. For anything active, keep it in mind.</p>

<h3 id="3-oversubscription-happens-on-the-switch-not-the-host">3. Oversubscription happens on the switch, not the host</h3>

<p>If you mirror several busy 10G or 25G ports into a 1G destination, the switch drops the excess before it ever reaches the NIC, and nothing on the host will tell you. Check the destination port speed (<code class="language-plaintext highlighter-rouge">ethtool enp65s0f0</code>) and the switch’s drop counters on the mirror session. If you need more, use a faster destination port or mirror less.</p>

<h3 id="4-nmstate-must-be-able-to-verify-the-change">4. nmstate must be able to verify the change</h3>

<p>After applying a policy, nmstate checks that the node still works. It pings the default gateway(s), checks DNS and contacts the API server. If any of those fail, it <strong>rolls the change back</strong>, even when your change had nothing to do with the failure.</p>

<p>I hit this on <code class="language-plaintext highlighter-rouge">snok</code>: the node had a stale IPv6 default gateway left over from an ISP prefix change. Every NNCP failed verification on the dead IPv6 gateway and was rolled back. One policy even ended up permanently stuck in <code class="language-plaintext highlighter-rouge">Pending / MaxUnavailableLimitReached</code>. If <code class="language-plaintext highlighter-rouge">oc get nnce</code> shows a policy cycling or stuck, check the nmstate handler logs for probe errors before blaming your YAML:</p>

<div class="language-bash highlighter-rouge"><div class="highlight"><pre class="highlight"><code>oc <span class="nt">-n</span> openshift-nmstate logs ds/nmstate-handler | <span class="nb">grep</span> <span class="nt">-i</span> probe
</code></pre></div></div>

<p>Fix the broken gateway first, then apply the bridge.</p>

<h3 id="5-dont-put-the-mirror-port-on-ovns-bridges">5. Don’t put the mirror port on OVN’s bridges</h3>

<p>It’s tempting to add the NIC to an OVS bridge and map it with an OVN <code class="language-plaintext highlighter-rouge">localnet</code> network, since that’s how secondary VLAN networks usually work in OpenShift Virtualization. For mirrored traffic it’s the wrong tool: OVN’s logical switch forwards by destination MAC and won’t hand foreign unicast frames to your VM ports. Keep the mirror on a plain Linux bridge, separate from <code class="language-plaintext highlighter-rouge">br-ex</code> and any OVN-mapped bridges.</p>

<h3 id="6-live-migration">6. Live migration</h3>

<p>The VMs can only run on nodes that have the mirror cable plugged in. On a single-node cluster that’s automatic. On multi-node clusters, the <code class="language-plaintext highlighter-rouge">resourceName</code> annotation keeps the scheduler honest, but live migration to a node without the mirror feed won’t work. Set <code class="language-plaintext highlighter-rouge">evictionStrategy: None</code> (or plan for the sensors to stop during node maintenance).</p>

<hr />

<h2 id="verifying-end-to-end">Verifying end to end</h2>

<ol>
  <li>On the node, check that mirrored traffic is arriving:
    <div class="language-bash highlighter-rouge"><div class="highlight"><pre class="highlight"><code>tcpdump <span class="nt">-i</span> enp65s0f0 <span class="nt">-nn</span> <span class="nt">-c</span> 10
</code></pre></div>    </div>
  </li>
  <li>Check that both taps are on the bridge:
    <div class="language-bash highlighter-rouge"><div class="highlight"><pre class="highlight"><code>bridge <span class="nb">link </span>show master br-mirror
</code></pre></div>    </div>
  </li>
  <li>Inside <strong>each</strong> guest, run <code class="language-plaintext highlighter-rouge">tcpdump -i eth1 -nn</code> and make sure you see traffic between <em>other</em> hosts. That’s the proof the hub is flooding and not just passing broadcasts.</li>
  <li>Generate a known flow from a mirrored host (for example <code class="language-plaintext highlighter-rouge">curl</code> a known site) and confirm both sensors see it.</li>
</ol>

<p>If the guests only see broadcasts, ARP and multicast but no unicast between other hosts, the bridge is still learning MACs. Check <code class="language-plaintext highlighter-rouge">ageing_time</code> on <code class="language-plaintext highlighter-rouge">br-mirror</code> and make sure it’s <code class="language-plaintext highlighter-rouge">0</code>.</p>

<hr />

<h2 id="summary">Summary</h2>

<p>To share one switch mirror port with several OpenShift Virtualization VMs:</p>

<ol>
  <li>Put the mirror NIC in a <strong>Linux bridge with <code class="language-plaintext highlighter-rouge">mac-ageing-time: 0</code></strong> and multicast snooping off, so the bridge acts as a hub. Turn off GRO/LRO on the NIC.</li>
  <li>Expose the bridge with a <strong><code class="language-plaintext highlighter-rouge">bridge</code> CNI NetworkAttachmentDefinition</strong> that has no IPAM.</li>
  <li>Give each VM a <strong>second <code class="language-plaintext highlighter-rouge">bridge</code> interface</strong> on that network and set it to promiscuous mode in the guest.</li>
  <li>Remember that a SPAN destination is usually receive-only. Use a separate normal port if your VMs need to send.</li>
</ol>

<p>It takes three short YAML files, and it avoids the destination-MAC filtering that defeats OVN, SR-IOV and macvtap for this use case.</p>]]></content><author><name>Nate Revo</name></author><category term="OpenShift" /><category term="OpenShift Virtualization" /><category term="networking" /><category term="nmstate" /><category term="homelab" /><summary type="html"><![CDATA[How to feed a single SPAN/mirror port into more than one OpenShift Virtualization VM, why the obvious options don’t work, and the bridge setting that fixes it.]]></summary></entry><entry><title type="html">Introducing Magic Proxy UBI</title><link href="https://nr3v0.github.io/2026/09/introducing-magic-proxy-ubi.html" rel="alternate" type="text/html" title="Introducing Magic Proxy UBI" /><published>2026-09-09T11:40:00-07:00</published><updated>2026-09-09T11:40:00-07:00</updated><id>https://nr3v0.github.io/2026/09/introducing-magic-proxy-ubi</id><content type="html" xml:base="https://nr3v0.github.io/2026/09/introducing-magic-proxy-ubi.html"><![CDATA[<p>I’ve been clauding around and shipped a project I’m genuinely proud of: <strong><a href="https://github.com/nr3v0/magic-proxy-ubi">Magic Proxy UBI</a></strong>, a from-scratch container image pairing HAProxy 3.3 (AWS-LC) with the HAProxy Data Plane API on Red Hat UBI10.</p>

<p>The backstory: my home lab ran HAProxy bolted onto pfSense for years, routing traffic across a dozen-plus internal apps and a few OpenShift clusters. I wanted it out of the firewall and into its own purpose-built, disposable container: non-root by design, with automatic Let’s Encrypt certs via DNS-01 (Porkbun), and a live REST API for config changes instead of editing files by hand.</p>

<p>A few things I’m happy with:</p>

<ul>
  <li>🔒 Runs as a non-root user, no <code class="language-plaintext highlighter-rouge">--cap-add</code> needed for privileged ports. A Linux file capability handles that.</li>
  <li>📦 Trimmed the image from 459MB down to 244MB by ripping out a redundant build stage.</li>
  <li>🔁 Certs issue and renew independently per domain (or grouped as SANs when a service needs it), so one DNS hiccup doesn’t take down the whole fleet.</li>
</ul>

<p>It’s live on GitHub if you want to see how it’s built: <a href="https://github.com/nr3v0/magic-proxy-ubi">https://github.com/nr3v0/magic-proxy-ubi</a></p>]]></content><author><name>Nate Revo</name></author><category term="homelab" /><category term="haproxy" /><category term="containers" /><category term="selfhosted" /><summary type="html"><![CDATA[I’ve been clauding around and shipped a project I’m genuinely proud of: Magic Proxy UBI, a from-scratch container image pairing HAProxy 3.3 (AWS-LC) with the HAProxy Data Plane API on Red Hat UBI10.]]></summary></entry><entry><title type="html">Adding nerdctl to an OpenShift 4 Windows Node</title><link href="https://nr3v0.github.io/2022/11/adding-nerdctl-to-openshift-4-windows.html" rel="alternate" type="text/html" title="Adding nerdctl to an OpenShift 4 Windows Node" /><published>2022-11-14T14:51:00-08:00</published><updated>2022-11-14T14:51:00-08:00</updated><id>https://nr3v0.github.io/2022/11/adding-nerdctl-to-openshift-4-windows</id><content type="html" xml:base="https://nr3v0.github.io/2022/11/adding-nerdctl-to-openshift-4-windows.html"><![CDATA[<h1 id="getting-a-windows-node-on-openshift">Getting a Windows Node on OpenShift</h1>
<p>… Not what this post is about, follow the Red Hat and Microsoft documentation and then consult with your certified Red Hat Solutions Architect or Consultant.</p>

<h1 id="now-that-i-have-a-windows-node">Now that I have a windows node</h1>
<ul>
  <li>&lt;WARNING&gt; Administering a windows node is highly discouraged and will probably result in an unsupported configuration.
In order to install nerdctl, log into the necessary Windows Node and switch to PowerShell.</li>
</ul>

<div class="language-plaintext highlighter-rouge"><div class="highlight"><pre class="highlight"><code>ssh win2022

Microsoft Windows [Version 10.0.20348.1070]
(c) Microsoft Corporation. All rights reserved.

administrator@WIN2022 C:\Users\Administrator&gt; powershell
Windows PowerShell
Copyright (C) Microsoft Corporation. All rights reserved.

Install the latest PowerShell for new features and improvements! https://aka.ms/PSWindows

PS C:\Users\Administrator&gt;
</code></pre></div></div>

<h1 id="append-to-system-path---permanently">Append to System PATH - Permanently</h1>
<p>Borrowing commands from a friendly blogger we need to append a new entry to the system PATH.
<a href="https://codingbee.net/powershell/powershell-make-a-permanent-change-to-the-path-environment-variable">Permanently Modify System Path</a>
Run these:</p>

<div class="language-plaintext highlighter-rouge"><div class="highlight"><pre class="highlight"><code>rem Show Current Path
PS C:\Users\Administrator&gt; $ENV:PATH
rem Save Current Path to a variable
PS C:\Users\Administrator&gt; $oldpath = (Get-ItemProperty -Path 'Registry::HKEY_LOCAL_MACHINE\System\CurrentControlSet\Control\Session Manager\Environment' -Name PATH).path

rem Add a new folder for our binary
PS C:\Users\Administrator&gt; mkdir C:\bin
rem Change directory to the new folder
PS C:\Users\Administrator&gt; cd C:\bin
PS C:\bin&gt; $newpath = "$oldpath;C:\bin"

rem Update System Path
PS C:\bin&gt; Set-ItemProperty -Path 'Registry::HKEY_LOCAL_MACHINE\System\CurrentControlSet\Control\Session Manager\Environment' -Name PATH -Value $newPath

rem Verify the Path
PS C:\bin&gt; (Get-ItemProperty -Path 'Registry::HKEY_LOCAL_MACHINE\System\CurrentControlSet\Control\Session Manager\Environment' -Name PATH).Path

rem Reboot node - or close out of your shells and relogin
Restart-Computer -Force
</code></pre></div></div>

<h1 id="download-and-install-nerdctlexe">Download and install nerdctl.exe</h1>
<p>With all that yak shaving out of the way we can get to it.
Find the latest windows release (nerdctl-x.y.z-windows-amd64.tar.gz)
<a href="https://github.com/containerd/nerdctl/releases/download/v1.0.0/nerdctl-1.0.0-windows-amd64.tar.gz">nerdctl-1.0.0-windows-amd64.tar.gz</a>
<a href="https://github.com/containerd/nerdctl/releases">nerdctl releases</a></p>

<div class="language-plaintext highlighter-rouge"><div class="highlight"><pre class="highlight"><code>rem start Powershell and change to the bin folder
rem Download the release file.
PS C:\bin&gt; curl https://github.com/containerd/nerdctl/releases/download/v1.0.0/nerdctl-1.0.0-windows-amd64.tar.gz -o nerdctl-1.0.0-windows-amd64.tar.gz

rem Extract nerdctl.exe from the compressed file
PS C:\bin&gt; tar -xzvf nerdctl-1.0.0-windows-amd64.tar.gz
x nerdctl.exe

rem Delete the compressed file
PS C:\bin&gt; rm nerdctl-1.0.0-windows-amd64.tar.gz

rem Test a nerdctl.exe command
PS C:\bin&gt; nerdctl.exe ps
CONTAINER ID    IMAGE    COMMAND    CREATED    STATUS    PORTS    NAMES

</code></pre></div></div>

<h1 id="celebrate">Celebrate</h1>
<p>You can now interact with your containers on the windows node.</p>]]></content><author><name>Nate Revo</name></author><category term="nerdctl" /><category term="OpenShift" /><category term="powershell" /><category term="Windows Server 2022" /><summary type="html"><![CDATA[Getting a Windows Node on OpenShift … Not what this post is about, follow the Red Hat and Microsoft documentation and then consult with your certified Red Hat Solutions Architect or Consultant.]]></summary></entry><entry><title type="html">Clearing Windows proxy from PowerShell</title><link href="https://nr3v0.github.io/2022/11/clearing-windows-proxy-from-powershell.html" rel="alternate" type="text/html" title="Clearing Windows proxy from PowerShell" /><published>2022-11-14T14:51:00-08:00</published><updated>2022-11-14T14:51:00-08:00</updated><id>https://nr3v0.github.io/2022/11/clearing-windows-proxy-from-powershell</id><content type="html" xml:base="https://nr3v0.github.io/2022/11/clearing-windows-proxy-from-powershell.html"><![CDATA[<h1 id="the-problem">The Problem</h1>
<p>The Windows Server 2022 Core VM we were working with had a http proxy set but the OpenShift cluster was in an environment that did not need a proxy.  Using the top google hits we were unable to clear the “advproxy” settings.</p>

<div class="language-plaintext highlighter-rouge"><div class="highlight"><pre class="highlight"><code>C:\&gt; netsh winhttp show proxy
Current WinHTTP proxy settings:

    Direct access (no proxy server).

C:\&gt; netsh winhttp show advproxy
{
        "Proxy":        "localhost:8080",
        "ProxyBypass":  "*"
}
</code></pre></div></div>

<p>Using <code class="language-plaintext highlighter-rouge">netsh winhttp reset proxy</code> only cleared the proxy settings.  It did NOT clear the advproxy settings.</p>

<h1 id="the-solution">The solution</h1>
<p>Create a JSON file with the settings required for <code class="language-plaintext highlighter-rouge">netsh winhttp set advproxy</code> command.</p>

<div class="language-plaintext highlighter-rouge"><div class="highlight"><pre class="highlight"><code>PS C:\Users\Administrator&gt; New-Item proxy.json
    Directory: C:\Users\Administrator

Mode                 LastWriteTime         Length Name
----                 -------------         ------ ----
-a----        11/14/2022   4:05 PM              0 proxy.json

PS C:\Users\Administrator&gt; Set-Content .\proxy.json '{"Proxy": "", "ProxyBypass": "", "AutoconfigUrl": "", "AutoDetect": false}'
PS C:\Users\Administrator&gt; Get-Content proxy.json
{"Proxy": ""}

</code></pre></div></div>

<p>Then execute the netsh command below:</p>

<div class="language-plaintext highlighter-rouge"><div class="highlight"><pre class="highlight"><code>netsh winhttp set advproxy setting-scope=machine settings-file=proxy.json

Current WinHTTP advanced proxy settings:

{
}

</code></pre></div></div>

<h1 id="thank-you">Thank You</h1>
<p>I do not know the difference between the two settings, just know they both influence the system.</p>]]></content><author><name>Nate Revo</name></author><category term="OpenShift" /><category term="powershell" /><category term="proxy" /><category term="Windows Server 2022" /><summary type="html"><![CDATA[The Problem The Windows Server 2022 Core VM we were working with had a http proxy set but the OpenShift cluster was in an environment that did not need a proxy. Using the top google hits we were unable to clear the “advproxy” settings.]]></summary></entry><entry><title type="html">OpenShift 4.11 - Nutanix and Windows Nodes Temporary Workaround</title><link href="https://nr3v0.github.io/2022/10/openshift-411-nutanix-and-windows-nodes.html" rel="alternate" type="text/html" title="OpenShift 4.11 - Nutanix and Windows Nodes Temporary Workaround" /><published>2022-10-25T14:51:00-07:00</published><updated>2022-10-25T14:51:00-07:00</updated><id>https://nr3v0.github.io/2022/10/openshift-411-nutanix-and-windows-nodes</id><content type="html" xml:base="https://nr3v0.github.io/2022/10/openshift-411-nutanix-and-windows-nodes.html"><![CDATA[<h1 id="openshift-411-and-windows-containers">OpenShift 4.11 and Windows Containers</h1>
<p>This feels like a match made in heaven for organizations that are slowly consuming their monoliths or who have decided on Microsoft technologies for their datacenter.  Either way, Windows Node support has come a long way in the last 2 years.</p>

<p>I must preface this discussion with the assumption that “everyone knows that Linux and WIndows are different”.  Not in the way “milk is different from water” but more along the lines of steak is different from broccoli.  Sure, there are many ways the interaction feels similar but would probably wouldn’t steam a nice steak or smother broccoli in steak sauce(not unreasonable).  Unfortunately, Kubernetes exposes all the ways the two are different.  Some of this is probably to the history of Kubernetes being developed on Linux, using Linux Containers, with the strong drive of kernel developers to maintain a stable ABI.  With WIndows 11 and Windows Server 2022 Microsoft has finally been able to address the ABI/Kernel version issues it suffered from and make the experience closer to Linux.  But there are so many other differences which I won’t address.</p>

<p>Next, many organizations are adopting Nutanix in their datacenters and wish to run WIndows Containers on OpenShift on Nutanix.  OpenShift 4.11+ on Nutanx is a wonderful combination and is fully supported.  Windows Container support in Kubernetes is coming along nicely.  Windows Server 2022 makes windows containers usable outside of AKS or Docker Desktop.  And the Red Hat Windows Machine Config Operator(WMCO) automates the process of adding a Windows VM to a Kubernetes cluster with the OpenShift Machine api.</p>

<p>The WMCO is written to deal with differences between Linux hosts and Windows hosts and is written and maintained by Red Hat and the community.  OpenSSH needs to be installed and enabled on the Windows host as this is the medium which files are transferred, services are created and the host gets configured.  As an operator, WMCO has its own lifecycle and support policy.  As of this writing it only supports platform types of (none, aws and vsphere).</p>

<p>At this point in time the only way to get a Windows Node in a cluster installed on Nutanix is with BYOH and some unsupported steps.
 Again THIS METHOD IS UNSUPPORTED and support is on its way.  Here is a rough outline too add a host assuming the SDN is OVNKubernetes and Hybrid Networking was configured at cluster install.</p>

<h1 id="steps">Steps</h1>
<ol>
  <li>Install cluster with <a href="https://docs.openshift.com/container-platform/4.11/installing/installing_nutanix/installing-nutanix-installer-provisioned.html#installation-configuration-parameters-network_installing-nutanix-installer-provisioned">networking.type: OVNKuberenetes</a> and <a href="https://docs.openshift.com/container-platform/4.11/networking/ovn_kubernetes_network_provider/configuring-hybrid-networking.html">HybridNetworking</a></li>
  <li>Run <a href="https://docs.openshift.com/container-platform/4.11/windows_containers/enabling-windows-container-workloads.html">prerequisites</a>
    <ul>
      <li>install wmco namespace</li>
      <li>install wmco operator</li>
      <li>create cloud-private-key secret
        <ul>
          <li>https://docs.openshift.com/container-platform/4.11/windows_containers/enabling-windows-container-workloads.html</li>
        </ul>
      </li>
    </ul>
  </li>
  <li>Create a VM and install Windows 2022 (core or ui)</li>
  <li>Make modifications to match the environment.</li>
  <li><a href="https://learn.microsoft.com/en-us/windows-server/administration/openssh/openssh_install_firstuse?tabs=powershell">Install OpenSSH</a></li>
  <li><a href="https://learn.microsoft.com/en-us/windows-server/administration/openssh/openssh_keymanagement">Create SSH Key for the Administrator user and add to administrator_authorized_user</a>
    <ul>
      <li><code class="language-plaintext highlighter-rouge">$powershell.exe get-content $env:ProgramData\ssh\administrators_authorized_keys</code></li>
    </ul>
  </li>
  <li>Verify you can log in from your bastion host</li>
  <li>OpenPort 10250
    <ul>
      <li><code class="language-plaintext highlighter-rouge">powershell.exe New-NetFirewallRule -DisplayName "ContainerLogsPort" -LocalPort 10250 -Enabled True -Direction Inbound -Protocol TCP -Action Allow -EdgeTraversalPolicy Allow</code></li>
    </ul>
  </li>
  <li>Run Windows SysPrep similar to the <a href="https://docs.openshift.com/container-platform/4.11/windows_containers/creating_windows_machinesets/creating-windows-machineset-vsphere.html#creating-the-vsphere-windows-vm-golden-image_creating-windows-machineset-vsphere">vsphere steps 8-9</a></li>
  <li>Shutdown VM and Create a Template or Disk Image</li>
  <li>Clone VM</li>
  <li>Start Cloned VM</li>
  <li>Verify IP is unique and verify reverse DNS (PTR) is correct</li>
  <li>Change hostname of Cloned VM
    <ul>
      <li><code class="language-plaintext highlighter-rouge">powershell.exe Rename-Computer -NewName &lt;valid-name&gt; -Restart</code></li>
      <li>reboot</li>
    </ul>
  </li>
  <li>As documented in the BYOH instructions <a href="https://docs.openshift.com/container-platform/4.11/windows_containers/byoh-windows-instance.html">Create windows-instances ConfigMap</a></li>
  <li>Initially you may see the node come into the cluster correctly.  However, once the kubelet starts it selects the “hybrid interface” IP and tries to join the cluster with this incorrect IP.</li>
  <li>Once you see the node added, Ready and Unscheduleable
    <ul>
      <li>ssh to windows host</li>
      <li>Display the binpath of the kubelet service
        <ul>
          <li><code class="language-plaintext highlighter-rouge">sc.exe qc kubelet</code></li>
        </ul>
      </li>
      <li>Copy binpath from above command and add <code class="language-plaintext highlighter-rouge">--node-ip=&lt;correct_ip&gt;</code> to the end
        <ul>
          <li><code class="language-plaintext highlighter-rouge">sc.exe config binPath= "c:\k\kubelet.exe --config=c:\k\kubelet.conf --bootstrap-kubeconfig=c:\k\bootstrap-kubeconfig --kubeconfig=c:\k\kubeconfig --cert-dir=c:\var\lib\kubelet\pki\ --windows-service --logtostderr=false --log-file=C:\var\log\kubelet\kubelet.log --register-with-taints=os=Windows:NoSchedule --node-labels=node.openshift.io/os_id=Windows --container-runtime=remote --container-runtime-endpoint=npipe://./pipe/containerd-containerd --resolv-conf= --cloud-provider= --v=3 --node-ip=192.168.20.104"</code></li>
        </ul>
      </li>
      <li>Restart kubelet
        <ul>
          <li><code class="language-plaintext highlighter-rouge">powershell restart-service kubelet</code></li>
        </ul>
      </li>
    </ul>
  </li>
  <li>Now you should see 3+ Approved CSR’s and your node should become Ready and Scheduleable</li>
</ol>

<h1 id="troubleshooting">Troubleshooting:</h1>
<h2 id="pending-csrs">Pending CSR’s?</h2>
<p>Indicates the reverse DNS record is missing or incorrect</p>
<h2 id="node-stuck-unscheduleable">Node stuck UnScheduleable?</h2>
<p>Node IP isn’t in the same subnet as the linux nodes.  Or Firewall is blocking something</p>

<h1 id="appendix---known-issues-with-windows-containers-on-nutanix">Appendix - Known issues with Windows Containers on Nutanix</h1>
<h2 id="kubelet-chooses-the-wrong-ip-to-add-to-the-cluster">Kubelet chooses the wrong IP to add to the cluster</h2>
<p>The kubelet code is failing to lookup the correct IP from the nutanix machine api implementation and falls into the “grab a random IP”, which obviously always grabs the wrong one.
This is what step #16 works around.  Providing an argument to the kubelet for the node-ip, bypassing auto-descovery.</p>
<h2 id="nutanix-machine-provider-api-hardcodes-legacy-bios-as-the-boot-mode">Nutanix Machine Provider API hardcodes “Legacy BIOS” as the boot mode</h2>
<p>Customers wishing to boot their kubernetes VM’s with UEFI will need to wait for the resolution of  <a href="https://github.com/openshift/machine-api-provider-nutanix/issues/29">Issue 29</a></p>
<h2 id="nutanix-machine-provider-api-only-accepts-image">Nutanix Machine Provider API only accepts “Image”</h2>
<p>Do not confuse this with a “Template”.  An Image in Nutanix defines just the disk volume (think VMDK or qcow2) and does not contain any VM definitions.
There is not an issue written to address this.</p>
<h2 id="but-i-want-to-try-a-machineset">But I want to try a MachineSet</h2>
<p>You can try.  Clone your existing machine set and make the correct modification.  However, the kubelet still chooses the incorrect IP and changes to the service get overwritten by WMCO and the machine-api</p>
<h2 id="where-can-i-follow-the-work">Where can I follow the work</h2>
<p><a href="https://issues.redhat.com/browse/RFE-3354">RFE-3354</a>
<a href="https://github.com/openshift/machine-api-provider-nutanix/issues/29">machine-api-provider-nutanix issue 29</a></p>]]></content><author><name>Nate Revo</name></author><category term="Nutanix" /><category term="OpenShift" /><category term="powershell" /><category term="Windows Server 2022" /><summary type="html"><![CDATA[OpenShift 4.11 and Windows Containers This feels like a match made in heaven for organizations that are slowly consuming their monoliths or who have decided on Microsoft technologies for their datacenter. Either way, Windows Node support has come a long way in the last 2 years.]]></summary></entry><entry><title type="html">Vim and Windows? YES!</title><link href="https://nr3v0.github.io/2022/09/vim-and-windows-yesvim-and-windows-yes.html" rel="alternate" type="text/html" title="Vim and Windows? YES!" /><published>2022-09-30T14:49:00-07:00</published><updated>2022-09-30T14:49:00-07:00</updated><id>https://nr3v0.github.io/2022/09/vim-and-windows-yesvim-and-windows-yes</id><content type="html" xml:base="https://nr3v0.github.io/2022/09/vim-and-windows-yesvim-and-windows-yes.html"><![CDATA[<h1 id="installing-vim-console-on-windows-2022-from-powershell">Installing vim-console on Windows 2022 from PowerShell</h1>
<p>Working with Windows Containers has provided me tremendous education.  Learning PowerShell has shown me how far the windows realm has come in the form of CLI management.  It still seems to be lacking in a few areas, and I really don’t like the extremely verbose syntax nor the single dash arguments.  But I digress.  This post is about solving a single problem.  The one problem with endless obtuse workarounds.</p>

<h2 id="problem">Problem</h2>
<p>Editing text files…from a windows CLI (cmd.exe, PowerShell, etc).</p>

<h2 id="solution">Solution</h2>
<p>Find the Microsoft equivalent of Vim.   Is that Notepad.exe?  Wordpad.exe?  Get-Contents?
Fail, Fail, Mostly-Fail</p>

<h2 id="my-solution">My Solution</h2>
<p>Install vim-console; an extremely powerful text editor that has proven to be the staple of all *nix users around the world for decades.</p>

<p>Note: There are many articles similar to <a href="https://adamtheautomator.com/powershell-text-editor/">How to Edit Files with a Real PowerShell Text Editor</a> that show how to use Chocolaty to install Vim, Emacs or Nano.  However, most of my use cases don’t allow Chocolaty in their datacenters.   So, we have to install vim the hard way.</p>

<h3 id="steps">Steps</h3>

<ol>
  <li>
    <p>SSH to your server.</p>

    <p>Don’t know how to setup ssh on Windows?  I will point you at their documentation:
<a href="https://learn.microsoft.com/en-us/windows-server/administration/openssh/openssh_install_firstuse?tabs=powershell">Getting Started OpenSSH for Windows</a></p>
  </li>
  <li>
    <p>Verify you are in PowerShell.</p>

    <p>Type the command <code class="language-plaintext highlighter-rouge">powershell</code> or <code class="language-plaintext highlighter-rouge">pwsh</code> and hit enter.</p>

    <p><img width="508" alt="image" src="/assets/images/vim-and-windows-yesvim-and-windows-yes/01-193352442-9bd2ed0c-c10a-4c49-a7fd-35b5e3191d34.png" /></p>

    <p>Look for the <code class="language-plaintext highlighter-rouge">PS</code> in front of your command prompt.</p>

    <p><img width="451" alt="image" src="/assets/images/vim-and-windows-yesvim-and-windows-yes/02-193352545-28d539db-c3fc-4572-a54e-a829011fb177.png" /></p>
  </li>
  <li>
    <p>Download vim-console artifacts from <a href="https://ftp.nluug.nl/pub/vim/pc/">NLUUG - dunno where I found this</a></p>

    <div class="language-plaintext highlighter-rouge"><div class="highlight"><pre class="highlight"><code>wget https://ftp.nluug.nl/pub/vim/pc/vim90rt.zip -o vim90rt.zip
wget https://ftp.nluug.nl/pub/vim/pc/vim90w32.zip -o vim90w32.zip
</code></pre></div>    </div>
  </li>
  <li>
    <p>Extract archives</p>

    <div class="language-plaintext highlighter-rouge"><div class="highlight"><pre class="highlight"><code>expand-archive .\vim90w32.zip -DestinationPath .
expand-archive  -Force .\vim90rt.zip -DestinationPath .
</code></pre></div>    </div>
  </li>
  <li>
    <p>Run installer</p>

    <div class="language-plaintext highlighter-rouge"><div class="highlight"><pre class="highlight"><code>cd vim\vim90
.\install.exe
</code></pre></div>    </div>

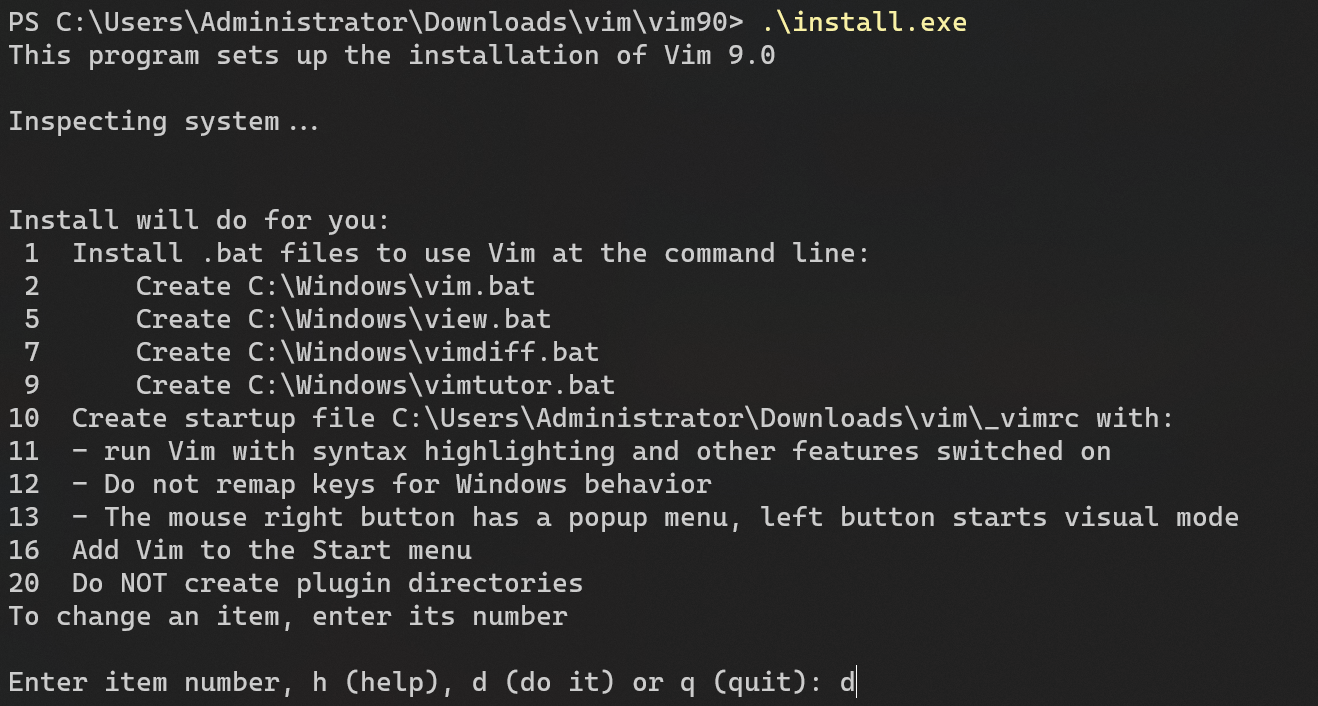
    <p>Change settings as needed and say <code class="language-plaintext highlighter-rouge">d</code> for do it.</p>

    <p><img width="659" alt="image" src="/assets/images/vim-and-windows-yesvim-and-windows-yes/03-193354139-39971c67-bbe7-45a5-9c4b-93e0657a234a.png" /></p>
  </li>
  <li>
    <p>Run and Profit</p>
    <ul>
      <li>Simply type <code class="language-plaintext highlighter-rouge">vim</code> and hit enter</li>
      <li>To exit, the key sequence <code class="language-plaintext highlighter-rouge">Esc-:-q-&lt;enter&gt;</code> will exit.</li>
    </ul>
  </li>
</ol>

<h2 id="conclusion">Conclusion</h2>
<p>I didn’t go into a lot of detail but hopefully this helps with the steps for using VIM.</p>

<p>-Nate</p>]]></content><author><name>Nate Revo</name></author><category term="powershell" /><category term="vim" /><category term="Windows Server 2022" /><summary type="html"><![CDATA[Installing vim-console on Windows 2022 from PowerShell Working with Windows Containers has provided me tremendous education. Learning PowerShell has shown me how far the windows realm has come in the form of CLI management. It still seems to be lacking in a few areas, and I really don’t like the extremely verbose syntax nor the single dash arguments. But I digress. This post is about solving a single problem. The one problem with endless obtuse workarounds.]]></summary></entry><entry><title type="html">Wrangling bash_history across multiple sesions</title><link href="https://nr3v0.github.io/2022/09/wrangling-bashhistory-across-multiple.html" rel="alternate" type="text/html" title="Wrangling bash_history across multiple sesions" /><published>2022-09-19T14:49:00-07:00</published><updated>2022-09-19T14:49:00-07:00</updated><id>https://nr3v0.github.io/2022/09/wrangling-bashhistory-across-multiple</id><content type="html" xml:base="https://nr3v0.github.io/2022/09/wrangling-bashhistory-across-multiple.html"><![CDATA[<h2 id="bash_history_file-or-histfile">BASH_HISTORY_FILE or HISTFILE</h2>
<p>I find myself constantly using multiple terminals on the same system.  The default bash history is a good start, but not enough for my needs.  After endless searching, testing, ignoring, deleting, and procrastinating I finally found a solution that works for me.</p>

<ol>
  <li>Session Isolation
    <ul>
      <li>I don’t need new history items available across sessions</li>
      <li>Typically the work I am preforming is isolated but similar enough that having commands updated between sessions is both obnoxious and unhelpful.</li>
    </ul>
  </li>
  <li>Custom Timestamp
    <ul>
      <li>I like seeing a particular timestamp format in my history output (helps me remember what I was doing at that time)</li>
    </ul>
  </li>
  <li>Dedupe
    <ul>
      <li>Like I mentioned above, I don’t need commands shared across terminal windows</li>
      <li>Also, I don’t like duplicate uses of command in my history</li>
      <li>Sure I may lose the first, or prior, occurrence(s) of a command.  But I only require the last use.</li>
    </ul>
  </li>
  <li>Write on session exit
    <ul>
      <li>I don’t want to lose my history to a <code class="language-plaintext highlighter-rouge">kill -i &lt;shell_pid&gt;</code></li>
      <li>I also don’t want to lose my history if I close the wrong session tab</li>
      <li>dedupe only needs to happen at this point</li>
    </ul>
  </li>
  <li>Use only linux bash commands
    <ul>
      <li>I don’t want to download some fancy utility.</li>
      <li>use the fewest number of commands</li>
    </ul>
  </li>
  <li>Unlimited history
    <ul>
      <li>computers are big enough and fast enough to handle this</li>
      <li>new versions of bash allow an unlimited history</li>
    </ul>
  </li>
</ol>

<h2 id="bashrc"><code class="language-plaintext highlighter-rouge">~/.bashrc</code></h2>

<div class="language-plaintext highlighter-rouge"><div class="highlight"><pre class="highlight"><code>HISTCONTROL=ignorespace:ignoredups:erasedups
shopt -s histappend
HISTSIZE=-1
HISTFILESIZE=-1
HISTTIMEFORMAT="[%b %d,%Y %T] "
PROMPT_COMMAND="history -a;${PROMPT_COMMAND}"
</code></pre></div></div>

<h2 id="etcprofiled00-dedup-bash-history-on-exitsh"><code class="language-plaintext highlighter-rouge">/etc/profile.d/00-dedup-bash-history-on-exit.sh</code></h2>

<div class="language-plaintext highlighter-rouge"><div class="highlight"><pre class="highlight"><code>function deduphistory {
  echo "deduphistory"
  history -w ~/.bash_history.dedup_backup
  history -n; history -a
  tac ~/.bash_history | awk '!x[$0]++' | tac &gt; ~/.bash_history_new_dedup
  history -cr ~/.bash_history_new_dedup
  history -w
}
# cleanup bash history on exit
trap deduphistory EXIT
</code></pre></div></div>

<h2 id="profit">Profit</h2>
<p>Watch your history get appended and deduped on exit.
No more lost history (mostly)
And be happy</p>

<h3 id="files-available-as-gists">Files available as gists</h3>
<p><a href="https://gist.github.com/therevoman/a7532af575479f0a2b5edfbb0bef8212">https://gist.github.com/therevoman/a7532af575479f0a2b5edfbb0bef8212</a></p>

<p>Originally posted on GitHub:
<a href="https://github.com/therevoman/nate-revo-blog/issues/2">https://github.com/therevoman/nate-revo-blog/issues/2</a></p>]]></content><author><name>Nate Revo</name></author><category term="awk" /><category term="bash" /><category term="histfile" /><summary type="html"><![CDATA[BASH_HISTORY_FILE or HISTFILE I find myself constantly using multiple terminals on the same system. The default bash history is a good start, but not enough for my needs. After endless searching, testing, ignoring, deleting, and procrastinating I finally found a solution that works for me.]]></summary></entry><entry><title type="html">Welcome to Revo Place</title><link href="https://nr3v0.github.io/2022/07/welcome-to-revo-place.html" rel="alternate" type="text/html" title="Welcome to Revo Place" /><published>2022-07-18T14:49:00-07:00</published><updated>2022-07-18T14:49:00-07:00</updated><id>https://nr3v0.github.io/2022/07/welcome-to-revo-place</id><content type="html" xml:base="https://nr3v0.github.io/2022/07/welcome-to-revo-place.html"><![CDATA[<p>I’m starting a new blog focusing on the technology I love and use everyday.  Come here to join the adventure.</p>

<p>My computer adventure started in the early (19)80’s with the TI-99 and various Tandy Computers.  I was the family “Technical Advisor” even though I really only knew just a little more than they did.  Fascinated by what they could offer I was exposed to the Nintendo, ColecoVision, Adam, Amiga 500, Packard Bell, and a Cray Supercomputer.  Being just a youngling I was not allowed to play with the beta edition of Windows NT running on it, but it inspired me to keep my mind open and always be learning.</p>

<p>In the early ’90s I entered the BBS scene and opened a BBS on my parents home computer.  Being the encouraging parents they are, and after seeing the first phone bill, they purchased a 2nd line on which I could run so their “ears would be preserved”.</p>

<p>In the mid 90’s I was introduced to this novel Operating System named Linux and downloaded the first release on 14 1.44mb floppy diskettes.  Having only 10 disks available I downloaded the first 10 disks during a University class.  That night I began the installation, leaving the computer on and praying there would be no power outage I overwrote the first few diskettes to get the remaining installation images.  Success!  I was presented with a shell prompt of some sort and my lack of knowledge kept me from doing anything more than <code class="language-plaintext highlighter-rouge">startx</code> and <code class="language-plaintext highlighter-rouge">xeyes</code>.</p>

<p>At University I was exposed to Caldera Linux, which I will still hail as the “easiest and most user-friendly” installation ever available.  Too bad their business ethics did what they did (enter groklaw).</p>

<p>With only one “Java” programming class under my belt I began my career as a web-developer with the goal of using Java on the AS/400 (iseries (is it now series-i?!)) and learning how to install WebSphere v1 and v3 on the platform’s IFS.</p>

<p>The next 18 years I moved around, working in various government and financial institutions.  This gave me exposure to many different organizational structures and to this day helps me relate to the struggles many IT staff experience.  And yes, I believe I can understand the frustration of infrastructure administrators AND developers.</p>

<p>In 2017 I discovered containers through docker and OpenShift v3.  I had no idea how big of an impact this would have on my career.  In fact, I was so impressed by the technology I jokingly sent in a resume in the hopes I could catch the train.  3 weeks later I arrived at Red Hat Tower in Raleigh, NC for my new hire orientation.  A few weeks after that I was sent to 2 weeks of OpenShift Bootcamp and was released into the wild as a Kubernetes (aka OpenShift) admin.  The journey from Java Developer to OpenShift infrastructure Administrator was enormous, one I am glad I made, and almost overbearing at times.  Thanks to the many great people at Red Hat and my great family I was able to made the transition.</p>

<p>Now, I spent my free time playing with my son, building many things and dabbling in all sorts of technology.  This blog is dedicated to my Technology adventures and I hope it helps someone else.</p>

<p>-Nate</p>]]></content><author><name>Nate Revo</name></author><summary type="html"><![CDATA[I’m starting a new blog focusing on the technology I love and use everyday. Come here to join the adventure.]]></summary></entry><entry><title type="html">The elusive Unit with ID “da2cba1f-a856-4a7e-8df0-b6f4101587af” could not be found.</title><link href="https://nr3v0.github.io/2019/08/the-elusive-unit-with-id-da2cba1f-a856.html" rel="alternate" type="text/html" title="The elusive Unit with ID “da2cba1f-a856-4a7e-8df0-b6f4101587af” could not be found." /><published>2019-08-19T22:23:00-07:00</published><updated>2019-08-19T22:23:00-07:00</updated><id>https://nr3v0.github.io/2019/08/the-elusive-unit-with-id-da2cba1f-a856</id><content type="html" xml:base="https://nr3v0.github.io/2019/08/the-elusive-unit-with-id-da2cba1f-a856.html"><![CDATA[<p>I have some “off” brand MiniPC’s that I wanted to add to my home lab.  While trying to register them, they all returned the same message.</p>

<p><strong><em>HTTP error (404 - Not Found): Unit with ID “da2cba1f-a856-4a7e-8df0-b6f4101587af” could not be found.</em></strong></p>

<p>I’m not exactly sure, but it seems the bios/efi information is the same across all the boxes.  To get arround the error with subscription-manager I logged directly into <a href="https://access.redhat.com/management/systems">https://access.redhat.com/management/systems</a> and added the system manually.   Once I had a UUID I ran subscription-manager again to register the system.</p>

<div class="language-plaintext highlighter-rouge"><div class="highlight"><pre class="highlight"><code>subscription-manager register --consumerid=&lt;new-uuid&gt;
</code></pre></div></div>

<p>Happy cheap labbing.</p>]]></content><author><name>Nate Revo</name></author><summary type="html"><![CDATA[I have some “off” brand MiniPC’s that I wanted to add to my home lab. While trying to register them, they all returned the same message.]]></summary></entry><entry><title type="html">RHV 4.3 misadventures and such</title><link href="https://nr3v0.github.io/2019/08/rhv-43-misadventures-and-such.html" rel="alternate" type="text/html" title="RHV 4.3 misadventures and such" /><published>2019-08-18T12:18:00-07:00</published><updated>2019-08-18T12:18:00-07:00</updated><id>https://nr3v0.github.io/2019/08/rhv-43-misadventures-and-such</id><content type="html" xml:base="https://nr3v0.github.io/2019/08/rhv-43-misadventures-and-such.html"><![CDATA[<p>This weekend started like any other.  I had grand hopes for getting my home lab in a place I can focus on OpenShift stuff.  You know,  Install RHV, OpenStack 13, CEPH 3 with RADOS gateway and a few other things.   But it wasn’t meant to be.</p>

<p>At least I could get RHV installed on my main Lab box (I’ll enumerate my lab later).  It’s big enough and fast enough that I can run RHV and put my control plane components on it (Ceph MON’s, OpenStack Director, etc) when I get the time.   So I started a RHV 4.3 installation.</p>

<p>It started pretty harmless.   Follow the pre-reqs, make sure you hardware is right, and set the repos.  Link: <a href="https://access.redhat.com/products/red-hat-virtualization/#getstarted">https://access.redhat.com/products/red-hat-virtualization/#getstarted</a></p>

<p>Because of a DNS quirk I introduced last year when wiring NetworkManager, libvirt and dnsmasq together, I had to restart the install more than a dozen times.  One involved having multiple IP’s returned for the hypervisor host, which was fixed in my local DNS provider (unbound).  I swapped back and forth between the cockpit and command line installs but it kept failing with an ssh error.   After a lot of googling I landed on the <code class="language-plaintext highlighter-rouge">host_key_checking=false</code> ansible setting, and after some lucky guesswork I determined it belonged in the file <code class="language-plaintext highlighter-rouge">/usr/share/ovirt-hosted-engine-setup/ansible/ansible.cfg</code>. And while I was in there I added a few performance tweaks, which left it looking like this:</p>

<div class="language-plaintext highlighter-rouge"><div class="highlight"><pre class="highlight"><code>## Modify Ansible to work properly for a lab?
/usr/share/ovirt-hosted-engine-setup/ansible/ansible.cfg
[defaults]
inventory = hooks/inventory
host_key_checking = false
forks = 20

[ssh_connection]
ssh_args = -o ControlMaster=auto -o ControlPersist=60s -o PreferredAuthentications=publickey
pipelining = true
</code></pre></div></div>

<p>This got me past the jankiness above.</p>

<p>The next error was a very strange parse error dumped by the vdsm-tool for the libvirt module.  The error was super misleading (complicated by my idiocy), so I traced into the code and found a parsing bug in my /etc/libvirt/qemu.conf file.  A long while back I had added <code class="language-plaintext highlighter-rouge">nvram</code> settings so I could boot UEFI vm’s.   The solution was to move the closing bracket off its own line.</p>

<p>Error Message:</p>

<div class="language-plaintext highlighter-rouge"><div class="highlight"><pre class="highlight"><code># vdsm-tool configure --module libvirt
Checking configuration status...
libvirt is not configured for vdsm yet
Traceback (most recent call last):
File "/usr/bin/vdsm-tool", line 220, in main
return tool_command[cmd]["command"](*args)
File "/usr/lib/python2.7/site-packages/vdsm/tool/__init__.py", line 40, in wrapper
func(*args, **kwargs)
File "/usr/lib/python2.7/site-packages/vdsm/tool/configurator.py", line 124, in configure
if _should_configure(c, pargs.force)]
File "/usr/lib/python2.7/site-packages/vdsm/tool/configurator.py", line 318, in _should_configure
if not _validate(c) and not configure_allowed:
File "/usr/lib/python2.7/site-packages/vdsm/tool/configurator.py", line 85, in _validate
return getattr(module, 'validate', lambda: True)()
File "/usr/lib/python2.7/site-packages/vdsm/tool/configurators/libvirt.py", line 72, in validate
return _isSslConflict()
File "/usr/lib/python2.7/site-packages/vdsm/tool/configurators/libvirt.py", line 115, in _isSslConflict
qconf_p.read(confutils.get_file_path('QCONF', FILES))
File "/usr/lib/python2.7/site-packages/vdsm/tool/configfile.py", line 266, in read
io.StringIO(u'[root]\n' + f.read())
File "/usr/lib64/python2.7/ConfigParser.py", line 324, in readfp
self._read(fp, filename)
File "/usr/lib64/python2.7/ConfigParser.py", line 546, in _read
raise e
ParsingError: File contains parsing errors:
[line 760]: u']\n'
</code></pre></div></div>

<p>These are the offending lines in <code class="language-plaintext highlighter-rouge">/etc/libvirt/qemu.conf</code>:</p>

<div class="language-plaintext highlighter-rouge"><div class="highlight"><pre class="highlight"><code>nvram = [
"/usr/share/edk2.git/ovmf-x64/OVMF_CODE-pure-efi.fd:/usr/share/edk2.git/ovmf-x64/OVMF_VARS-pure-efi.fd"
]
</code></pre></div></div>

<p>Here is the fix:</p>

<div class="language-plaintext highlighter-rouge"><div class="highlight"><pre class="highlight"><code>nvram = [ "/usr/share/edk2.git/ovmf-x64/OVMF_CODE-pure-efi.fd:/usr/share/edk2.git/ovmf-x64/OVMF_VARS-pure-efi.fd" ]
</code></pre></div></div>

<p>The rest of the install proceeded without incident!  WooHoo!!!   I have RHV!</p>

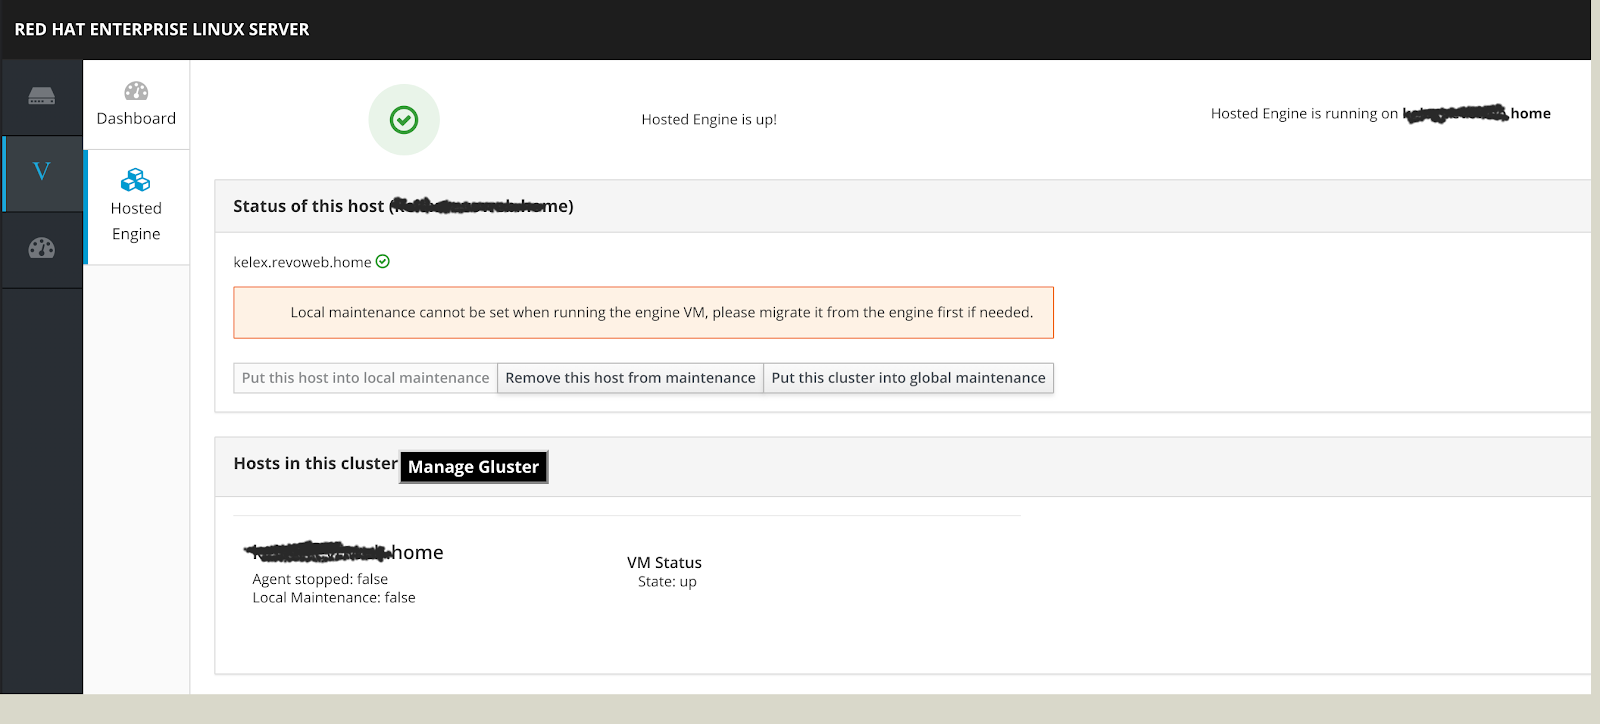
<p><img src="/assets/images/rhv-43-misadventures-and-such/01-RHV-Complete.png" alt="" /></p>

<p>Ugh, what’s that Gluster thing?</p>]]></content><author><name>Nate Revo</name></author><summary type="html"><![CDATA[This weekend started like any other. I had grand hopes for getting my home lab in a place I can focus on OpenShift stuff. You know, Install RHV, OpenStack 13, CEPH 3 with RADOS gateway and a few other things. But it wasn’t meant to be.]]></summary></entry></feed>